Can you do me a favor?
Early this past spring, a couple approached a couple to incorporate their love of music into a wedding favor for their wedding guests.
It all started with a Reddit post the couple saw featuring the iconic Dave Mathews Band Fire Dancer posed as a 3D figurine.

We had a brief phone consultation about their visions, 3D printing, and options. After that, I drafted a few figurines over the next two weeks. I quickly realized my desktop printer limitations with respect to the model details and my printer build volume. With about 10 failed attempts I stopped and pivoted direction on the piece.
I knew I could build flat, clean, and fast. At our next appointment, I showed the couple what I could do and settled on a more realistic option for their favors which I could better customize and make their own as a functional wedding favor that would adequately represent them.


The second iteration was a hit! The couple loved the personalization and adored the honeycomb infill. They were additionally impressed with the magnet and hanging versatility. In fact, they wanted to know if there was an option for a larger centerpiece. Of course, I couldn’t say no to a challenge.

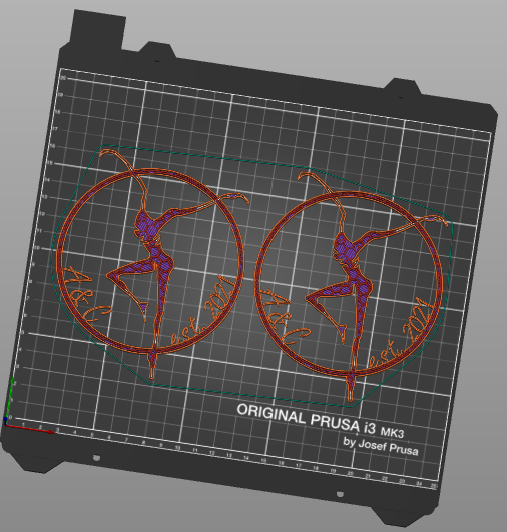
I found the Macro FCCircularText to help me out. This macro wrap stings into circular patterns and orientations, including circumferential and helical, clocks, and angled rings. This helped add the couple’s initials and wedding date to the ornament with ease. I added a bow for the final touches and the result was fantastic. The piece really commemorated their special day and allowed for guests to keep the ornament as a hanging piece using the ribbon tied around the top or on the fridge by using the magnet in the back.
With a few more tweaks, the couple was in love! They decided on four colors, purple, orange, red, and blue to capture the “fire” of the fire dancer. I went with translucent PETG 1.75 mm from amazon for each color. They all worked really well with the Prusa PETG settings in the PRUSA Slicer.

My printer settings included a 0.6 mm nozzle, 0.20 mm DETAIL print setting, Prusa PETG filament, 20% infill, no brim, no supports, smooth build plate, no glue or tape, at 2 pieces / build. Each build consumed about 8.25 meters of filament or about 25 grams for a total build time of about 2 hours. I finished off the ornaments with a sharp Exacto knife, precision tweezers, and a lighter to singe the stringy bits.
Voilà! here is the finished product! Each piece was finished off with a sheer satin sinch bag for each of the wedding guests to take home.
